Time flies, and another LFNW is upon us. I haven't fully decompressed from attending my first OpenStack Summit but now I have to switch gears and get ready for LFNW.
This year I'm giving 3 presentations, one of which is a 80 minute session that I'm sharing with a good friend -- a repeat of a popular session we did last year. Here is a link to the sessions:
LFNW is a free event with good quality sessions given by good quality people. The "hallway track" is just as valuable as the other tracks as you can build lasting relationships with the tech movers and shakers of the area.
This will be something like my 10th year going. I hope to see some of you there too!
Tuesday, April 23, 2013
Monday, February 18, 2013
Documenting python code using sphinx and github
Documentation is good right? Doesn't everybody like to have a good source of documents when working with a piece of software? I know I sure do. But creating documentation can be a drag, and creating pretty documentation can be even more of a drag, more time consuming than writing the code in the first place. Ain't nobody got time for that!
Thankfully there are utilities out there that will help with creating documentation. My language of choice is Python and for generating documentation I like to use Sphinx. Sphinx appeals to me because much of the documentation can be auto-generated based on existing code. It works with python docstrings in a way that can be PEP257 compatible. It takes very little setup to get from nothing to decent looking documentation. For an example of what sphinx output can look like, see my pyendeavor project.
The first step is to make frequent use of docstrings in the code. Not only will this help to generate useful documentation later, but it is also really handy for anybody working with the code to understand what the code is doing. A docstring is a string literal that occurs as the first statement in a module, function, class, or method definition. It's more than just a comment, because it will become an attribute of the object itself. When I look at a function or a class init I ask 3 main questions:
Those three lines answer the question pretty well, and if we were just going to look at the code and not try to generate html/pdf/whatever documentation we could be done. Instead lets try to give it a little more structure, structure that sphinx will appreciate:
A human reading this docstring is still going to know what's going on pretty well, and sphinx is going to read it even better:
The python source files themselves service as input to the documentation creation tool. Just go about the business of writing code and keep the docstrings flowing and updated with changes and very useful documentation can be produced.
How does one generate the documentation though? How does one use sphinx? I'm glad you asked! Sphinx has a utility that can help get started -- sphinx-apidoc. First make a docs/ subdir of the project (or whatever you want to call it). This is where some sphinx control files will go, although the rendered output doesn't necessarily have to go there. For my example software pyendeavor I have a single python package, pyendeavor, located in the src/pyendeavor directory. To get started with sphinx, I would issue the command:
The F causes a full setup to happen, the -o docs tells sphinx to direct it's output to the newly created docs directory, and the src/ tells sphinx to look in src/ for my modules.
Sphinx uses reStructuredText as the input format, which is pretty easy to work with. And if we look at the files it generated for us, we'll see that there isn't much there:
And if we look in the pyendevor file we'll see more, but here is a snippit:
This just tells sphinx to read the module files and generate content for module members, undocumented members, and to follow inheritance. These are all just commands that sphinx understands, but you don't really have to.
There is a conf.py file that will need some attention. Sphinx will need to know how to import the code, so a system path entry to where the code can be found needs to be added. There is a helpful comment near the top, just clear the hash and update the path:
Now we are ready to make some content! Make sure to be in the docs/ dir and run make. A list of possible make targets will be displayed, but the we care about is 'html', so run that one:
Lots of output, but the end result is some html pages in _build/html/ :
A browser can be used to view index.html and all the linked docs. How awesome! Useful documentation without having to do much more than just use docstrings in the code (which should be done anyway).
Now that docs can be generated, they should be put somewhere useful. That's where the github part of this post comes in. A lot of projects are posted on github and I've started using it for more of mine too. One nice feature is a way to create a webspace for a project by pushing content to a 'gh-pages' branch of a project. These following steps will help setup a repo to have a place to publish the html content of sphinx. They are based on the directions I found here, however instead of using a directory outside our project space we're going to make use of a git workdir so that we never have to leave the project directory to get things done.
First lets create a directory to hold our new branch from the top level of our source.
Next create a new workdir named html within that directory:
(More information about git-new-workdir can be found here but essentially it is a way to create a subdirectory that can be checked out to a new branch, but all the git content will be linked. A git fetch in the topdir of the clone will also update the git content in the workdir path. No need for multiple pulls.)
Now we have to prepare the workdir for sphinx content. To do this we need to create an empty gh-pages branch within the html directory:
Initially there will be a copy of the source tree in the html directory that can be blown away with:
Back in the docs/ directory a change needs to be made to the Makefile to tell it to output content to where we want it, the gh-pages/html/ directory. Look for:
and change it to
Now from the docs/ directory, run make html again. This time you'll notice that the output goes to ../gh-pages/html/
Switching back to that directory the files can be added and committed with:
Now the branch can be pushed to github:
After upwards to 10 minutes later the pages site for the repo can be visited, like mine for pyendeavor. Github also has a feature for README files in the base of your repo, supporting/rendering markdown and reStructuredText. This README.rst file can also be included in your pages output with a simple tweak to the index.rst file in docs/. The ..include directive will tell sphinx to include the content from the README.rst file when generating html output:
The README.rst file source can be seen here. The same content of the README file will display in the generated docs, updating this content only has to happen once.
It is a good idea to add the control files in docs/ to the repository and keep them under source control:
If new modules or packages are added to the source tree then a new run of sphinx-apidoc is necessary. The -f flag will tell sphinx that it is OK to overwrite the existing files:
When functions change or new docstrings are added to the code new html content needs to be generated by running make html and committing/pushing the new content in the gh-pages/html/ directory.
That's all there is to it, sphinx generated docs rendered by github via the gh-pages branch. All within a single directory tree. Have fun, and get to documenting!
Thankfully there are utilities out there that will help with creating documentation. My language of choice is Python and for generating documentation I like to use Sphinx. Sphinx appeals to me because much of the documentation can be auto-generated based on existing code. It works with python docstrings in a way that can be PEP257 compatible. It takes very little setup to get from nothing to decent looking documentation. For an example of what sphinx output can look like, see my pyendeavor project.
The first step is to make frequent use of docstrings in the code. Not only will this help to generate useful documentation later, but it is also really handy for anybody working with the code to understand what the code is doing. A docstring is a string literal that occurs as the first statement in a module, function, class, or method definition. It's more than just a comment, because it will become an attribute of the object itself. When I look at a function or a class init I ask 3 main questions:
- What does this code do?
- What are the inputs to it?
- What will I get in return?
def func(foo):

    """This function translates foo into bar

    The input is a foo string
    the output is a bar string
    """
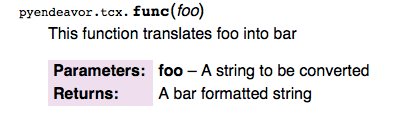
Those three lines answer the question pretty well, and if we were just going to look at the code and not try to generate html/pdf/whatever documentation we could be done. Instead lets try to give it a little more structure, structure that sphinx will appreciate:
def func(foo):

    """This function translates foo into bar

    :param foo: A string to be converted
    :returns: A bar formatted string
    """
A human reading this docstring is still going to know what's going on pretty well, and sphinx is going to read it even better:
The python source files themselves service as input to the documentation creation tool. Just go about the business of writing code and keep the docstrings flowing and updated with changes and very useful documentation can be produced.
How does one generate the documentation though? How does one use sphinx? I'm glad you asked! Sphinx has a utility that can help get started -- sphinx-apidoc. First make a docs/ subdir of the project (or whatever you want to call it). This is where some sphinx control files will go, although the rendered output doesn't necessarily have to go there. For my example software pyendeavor I have a single python package, pyendeavor, located in the src/pyendeavor directory. To get started with sphinx, I would issue the command:
$ sphinx-apidoc -A "Jesse Keating" -F -o docs src/
The F causes a full setup to happen, the -o docs tells sphinx to direct it's output to the newly created docs directory, and the src/ tells sphinx to look in src/ for my modules.
$ sphinx-apidoc -F -o docs src/
Creating file docs/pyendeavor.rst.
Creating file docs/conf.py.
Creating file docs/index.rst.
Creating file docs/Makefile.
Creating file docs/make.bat.
$ ls docs/
Makefile       _static        conf.py        make.bat
_build         _templates     index.rst      pyendeavor.rst
Sphinx uses reStructuredText as the input format, which is pretty easy to work with. And if we look at the files it generated for us, we'll see that there isn't much there:
$ cat docs/index.rst
.. src documentation master file, created by
   sphinx-quickstart on Mon Feb 18 17:44:53 2013.
   You can adapt this file completely to your liking, but it should at least
   contain the root `toctree` directive.

Welcome to src's documentation!
===============================

Contents:

.. toctree::
   :maxdepth: 4

   pyendeavor

Indices and tables
==================

* :ref:`genindex`
* :ref:`modindex`
* :ref:`search`
And if we look in the pyendevor file we'll see more, but here is a snippit:
:mod:`pyendeavor` Package
-------------------------

.. automodule:: pyendeavor
    :members:
    :undoc-members:
    :show-inheritance:

:mod:`api` Module
-----------------

.. automodule:: pyendeavor.api
    :members:
    :undoc-members:
    :show-inheritance:
This just tells sphinx to read the module files and generate content for module members, undocumented members, and to follow inheritance. These are all just commands that sphinx understands, but you don't really have to.
There is a conf.py file that will need some attention. Sphinx will need to know how to import the code, so a system path entry to where the code can be found needs to be added. There is a helpful comment near the top, just clear the hash and update the path:
sys.path.insert(0, os.path.abspath('/Users/jkeating/src/pyendeavor/src/'))
Now we are ready to make some content! Make sure to be in the docs/ dir and run make. A list of possible make targets will be displayed, but the we care about is 'html', so run that one:
$ make html

sphinx-build -b html -d _build/doctrees   . _build/html

Making output directory...
Running Sphinx v1.1.3
loading pickled environment... not yet created
building [html]: targets for 2 source files that are out of date
updating environment: 2 added, 0 changed, 0 removed
reading sources... [100%] pyendeavor
looking for now-outdated files... none found
pickling environment... done
checking consistency... done
preparing documents... done
writing output... [100%] pyendeavor
writing additional files... (5 module code pages) _modules/index
 genindex py-modindex search
copying static files... WARNING: html_static_path entry '/Users/jkeating/src/pyendeavor/docs/_static' does not exist
done
dumping search index... done
dumping object inventory... done
build succeeded, 1 warning.

Build finished. The HTML pages are in _build/html.
Lots of output, but the end result is some html pages in _build/html/ :
$ ls _build/html/
_modules         genindex.html    py-modindex.html searchindex.js
_sources         index.html       pyendeavor.html
_static          objects.inv      search.html
A browser can be used to view index.html and all the linked docs. How awesome! Useful documentation without having to do much more than just use docstrings in the code (which should be done anyway).
Now that docs can be generated, they should be put somewhere useful. That's where the github part of this post comes in. A lot of projects are posted on github and I've started using it for more of mine too. One nice feature is a way to create a webspace for a project by pushing content to a 'gh-pages' branch of a project. These following steps will help setup a repo to have a place to publish the html content of sphinx. They are based on the directions I found here, however instead of using a directory outside our project space we're going to make use of a git workdir so that we never have to leave the project directory to get things done.
First lets create a directory to hold our new branch from the top level of our source.
$ mkdir gh-pages
Next create a new workdir named html within that directory:
$ /usr/local/share/git-core/contrib/workdir/git-new-workdir . gh-pages/html
(More information about git-new-workdir can be found here but essentially it is a way to create a subdirectory that can be checked out to a new branch, but all the git content will be linked. A git fetch in the topdir of the clone will also update the git content in the workdir path. No need for multiple pulls.)
Now we have to prepare the workdir for sphinx content. To do this we need to create an empty gh-pages branch within the html directory:
$ cd gh-pages/html
$ git checkout --orphan gh-pages
Initially there will be a copy of the source tree in the html directory that can be blown away with:
$ git rm -rf .
Back in the docs/ directory a change needs to be made to the Makefile to tell it to output content to where we want it, the gh-pages/html/ directory. Look for:
BUILDDIR = _build
and change it to
BUILDDIR = ../gh-pages/html
Now from the docs/ directory, run make html again. This time you'll notice that the output goes to ../gh-pages/html/
Switching back to that directory the files can be added and committed with:
$ git add .
$ git commit -am 'Initial checkin of sphinx generated docs'
Now the branch can be pushed to github:
$ git push -u origin gh-pages
After upwards to 10 minutes later the pages site for the repo can be visited, like mine for pyendeavor. Github also has a feature for README files in the base of your repo, supporting/rendering markdown and reStructuredText. This README.rst file can also be included in your pages output with a simple tweak to the index.rst file in docs/. The ..include directive will tell sphinx to include the content from the README.rst file when generating html output:
Welcome to pyendeavor's documentation!
======================================
.. include:: ../README.rst

Contents:
The README.rst file source can be seen here. The same content of the README file will display in the generated docs, updating this content only has to happen once.
It is a good idea to add the control files in docs/ to the repository and keep them under source control:
docs/Makefile
docs/conf.py
docs/*.rst
docs/make.bat
If new modules or packages are added to the source tree then a new run of sphinx-apidoc is necessary. The -f flag will tell sphinx that it is OK to overwrite the existing files:
$ sphinx-apidoc -f -o docs/ src/
When functions change or new docstrings are added to the code new html content needs to be generated by running make html and committing/pushing the new content in the gh-pages/html/ directory.
That's all there is to it, sphinx generated docs rendered by github via the gh-pages branch. All within a single directory tree. Have fun, and get to documenting!
Tuesday, February 12, 2013
Python magic and remote APIs
I'm a pretty big fan of Python as a programming language. It allows me to program by discovery, that is poke and prod at things until the work. Not having to compile an entire program every time I change something is pretty fantastic, as is the ability to insert a debug statement and be able to break a program at that point, then run arbitrary python code within that context. Pretty indispensable to how I write software.
Another thing I like about Python, which some may not, is the ability to do magic things. Not quite so magic as xkcd would like us to believe, but fun stuff indeed.
Recently one of the services at work grew a json API to bang against, and for fun I thought I'd whip up some python to play with it. My team had a few utility scripts that would bang on the old xmlrpc interface to get some data, I wanted to see how much faster it was with json.
First, if you have to do anything web stuff, you really should be using the Requests module. It is so, so much better than using urllib(2) directly.
The API I wanted to program against had an Auth end point that would return to you a token string. This string could be included with later API calls to provide authentication. Requests lets you create a session object that can have attributes that carry on to all web calls, such as a custom auth header with a token.
Now the session object can be used just like requests itself, and it'll include the new header we've added. While this was neat at first, I quickly realized that I wanted to make this session object an attribute of a more generic object for working with the API. Each time you use session or requests you have to fill in a url and that's tedious, so I made a python class to handle that for me. One bit of magic I used here was a python property.
A python property is a way populate a class attribute on the fly / as needed without the code using your object needing to know that it's happening behind the scenes. It's a getter/setter without having to get and set, and it caches the value for future getting. My class sets some data during the init process, and creates a property for the session attribute, which can then be used in later functions, like a login or query function.
With this structure we can do things like:
We get back a json blob that has what the API returned to us. What happened was that the query function built up the information for the requests bit, which was passed into self.session.post(). Since this was the first time trying to access self.session we went through the @property tagged session() function. That function determined that self._session was not populated yet and called _auth(). _auth() in turn did the login dance to generate the token, built up a requests.Session object, tweaked the header and stuffed it into self._session. session() then returned that to the caller thus delivering the actual session object. Magic! The next time session is accessed it will quickly return the value of self._session. Properties are awesome and useful.
A CServ() object is okay, but not useful on its own. If I wanted to get a bit of data about a computer and use that data numerous times I'd either have to store a copy of the data in a local variable, or do queries each time I wanted the data. Neither are efficient. What I really want is to be able to create a Computer object, and from that object access attributes directly, like say Computer.name. Here is where some more magic comes in. We already know we can create properties to back attributes. We could go find out what all possible things we could look up about a computer in our CServ service, then write out properties for each of those. That... doesn't sound fun. Particularly if you think about this CServ having Computer items, Switch items, Account items, etc... That would be a lot of typing!
What if instead there was a way to do dynamic properties? What if when we tried to access Computer.primary_ip the code would just know to do a query to look up the 'primary_ip' attribute of a Computer.Computer cserv API class? Well we're in luck, because there is a way!
First we're going to create a subclass of CServ, CServOBJ. This class will be a base class for any number of objects, like Computers, Accounts, etc.. We can save a lot of code duplication by putting the shared bits in CServOBJ.
Right now we don't need to overload the __init__ method, so we can dive right into the magic. In python, when you attempt to access an object's attribute, behind the scenes an object's __getattr__(attribute) method is called. Normally you don't see it because it's all built in, but we can override it to make attribute access do something different. In our case, we want to do an API look up to get the value if we don't already have it, so we'll overload the function:
Objects in python also have a built in __dict__ that keeps track of all the attributes. Our simple little bit of code will try to return the value for the name of the attribute the function gets. If that attribute doesn't exist in the built in dict, a keyerror would happen. We catch that error and call our _setAttrib() function. This function is where the look up is built up using some other class attributes we'll get to later. A session call is made and the value is fed into the setattr python built-in. All this work happens behind the scenes to the bit of code just trying to access the attribute, and the lookup only happens once. That's all we really need for now in the base class, lets create a Computer class.
That's all there is to it. _qclass is defined as a class attribute, it does not change per-object. It is the class name passed into the remote API. The object creation takes a number, which is the identifier for computers in our system. It assigns that to the number attribute so that if we reference computer.number we don't make another API call. _qval is the place holder that will be common across all the objects for what do use as a look up key. The parent class's init is called (which skips all the way up to CServ) to complete the object creation.
With this setup, we can program against it very easily to access and cache data:
MAGIC!
Now if you are like me, you spend a lot of time in things like ipython or bpython to interactively program stuff and play with objects and whatnot. These environments provide tab completion, help functions, etc... With our current code though, we couldn't tab complete the available attributes. Only the name attribute and the functions we've created would show up. To fix that, we need to overload the built in __dir__ function. This function is used when getting a listing of what is available to an object, dir(object). A useful exploratory tool. ipython/bpython use this method to see what tab completion options to provide you. Luckily our internal service provides an API call to get a listing of possible attributes, so we can hook that into __dir__. But of course we only want to do this API call once (per object) so we will want to make it a property. Since there is nothing API class specific we can put the code into the CServOBJ class:
Since we are creating a property at this level we will grow an __init__ function to prep for that. Then we define the attribs() function. A short-cut is taken here, instead of calling out to some other function to load the attributes the load is done directly. Any time a Computer object gets a dir() call our overloaded function will return a sorted list that is the combination of the built in functions/attributes, anything that has been added to the specific object, and the available API attributes. Tab-completion achieved!
This has been a quick look into some of the magic you can do with Python. It's not quite antigravity, but it is useful, and food for thought for anybody that's programming against remote APIs. Objects are good, objects with dynamic attributes are better, and tab completion is icing on the cake. Enjoy!
Another thing I like about Python, which some may not, is the ability to do magic things. Not quite so magic as xkcd would like us to believe, but fun stuff indeed.
Recently one of the services at work grew a json API to bang against, and for fun I thought I'd whip up some python to play with it. My team had a few utility scripts that would bang on the old xmlrpc interface to get some data, I wanted to see how much faster it was with json.
First, if you have to do anything web stuff, you really should be using the Requests module. It is so, so much better than using urllib(2) directly.
The API I wanted to program against had an Auth end point that would return to you a token string. This string could be included with later API calls to provide authentication. Requests lets you create a session object that can have attributes that carry on to all web calls, such as a custom auth header with a token.
resp = requests.get('https://URL/api/auth/USERNAME?password=DATA')
resp.json()
  u'LONGSTRING'
token = resp.json()
session = requests.Session()
session.headers.update({'X-Auth': token})
Now the session object can be used just like requests itself, and it'll include the new header we've added. While this was neat at first, I quickly realized that I wanted to make this session object an attribute of a more generic object for working with the API. Each time you use session or requests you have to fill in a url and that's tedious, so I made a python class to handle that for me. One bit of magic I used here was a python property.
A python property is a way populate a class attribute on the fly / as needed without the code using your object needing to know that it's happening behind the scenes. It's a getter/setter without having to get and set, and it caches the value for future getting. My class sets some data during the init process, and creates a property for the session attribute, which can then be used in later functions, like a login or query function.
class CServ(object):
    """A cservice object that we will interact with."""

    def __init__(self):
        self.API = 'URL'
        self.SessURL = self.API + 'session/'
        self.QAPI = self.API + 'query/'
        self._session = None

    def _login(self):
        username = myuser
        password = mypass
        data = {'password': password}
        r = requests.get('%sauth/%s' % (self.API, username), params=data)
        return r.json()

    @property
    def session(self):
        if not self._session:
            self._auth()
        return self._session

    def _auth(self):
        token = self._login()
        # Build up a session object with the token
        s = requests.Session()
        s.headers.update({'X-Auth': token})
        self._session = s

    def query(self, classname, load_arg, attributes=None):
        """Wrangle a query into the json interface.

        classname -- The name of the cserv api class to query against
        load_arg -- The argument to query for (can be a list)
        attributes -- an optional list of what to return

        returns jsonified results
        """

        # See if we have a list of load args to go through
        if type(load_arg) == list:
            # Build up a dict of the bits we need to pass in
            bits = []
            for arg in load_arg:
                qdict = {'class': classname, 'load_arg': arg}
                if attributes:
                    qdict['attributes'] = attributes
                bits.append(qdict)
        else:
            bits = {'class': classname, 'load_arg': load_arg}
            if attributes:
                bits['attributes'] = attributes

        data = self.session.post(self.QAPI, json.dumps(bits))
        return data.json()
With this structure we can do things like:
cserv = CServ()
cserv.query('Computer.Computer', 432807, attributes=['name'])
  [{u'count': 1, u'load_arg': 432807, u'limit': 1, u'result':
[{u'name': u'silly.hostname.here.com'}], u'offset': 0,
u'class': u'Computer.Computer'}]
We get back a json blob that has what the API returned to us. What happened was that the query function built up the information for the requests bit, which was passed into self.session.post(). Since this was the first time trying to access self.session we went through the @property tagged session() function. That function determined that self._session was not populated yet and called _auth(). _auth() in turn did the login dance to generate the token, built up a requests.Session object, tweaked the header and stuffed it into self._session. session() then returned that to the caller thus delivering the actual session object. Magic! The next time session is accessed it will quickly return the value of self._session. Properties are awesome and useful.
A CServ() object is okay, but not useful on its own. If I wanted to get a bit of data about a computer and use that data numerous times I'd either have to store a copy of the data in a local variable, or do queries each time I wanted the data. Neither are efficient. What I really want is to be able to create a Computer object, and from that object access attributes directly, like say Computer.name. Here is where some more magic comes in. We already know we can create properties to back attributes. We could go find out what all possible things we could look up about a computer in our CServ service, then write out properties for each of those. That... doesn't sound fun. Particularly if you think about this CServ having Computer items, Switch items, Account items, etc... That would be a lot of typing!
What if instead there was a way to do dynamic properties? What if when we tried to access Computer.primary_ip the code would just know to do a query to look up the 'primary_ip' attribute of a Computer.Computer cserv API class? Well we're in luck, because there is a way!
First we're going to create a subclass of CServ, CServOBJ. This class will be a base class for any number of objects, like Computers, Accounts, etc.. We can save a lot of code duplication by putting the shared bits in CServOBJ.
class CServOBJ(CServ):
    """A base CServ object class to build from"""
Right now we don't need to overload the __init__ method, so we can dive right into the magic. In python, when you attempt to access an object's attribute, behind the scenes an object's __getattr__(attribute) method is called. Normally you don't see it because it's all built in, but we can override it to make attribute access do something different. In our case, we want to do an API look up to get the value if we don't already have it, so we'll overload the function:
    def __getattr__(self, name):
        try:
            return self.__dict__[name]
        except KeyError:
            self._setAttrib(name)
            return self.__dict__[name]

    def _setAttrib(self, name):
        resp = self.session.get('%sattribute/%s/%s/%s' %
                                (self.API, self._qclass, self._qval, name))
        resp.raise_for_status()
        setattr(self, name, resp.json())
Objects in python also have a built in __dict__ that keeps track of all the attributes. Our simple little bit of code will try to return the value for the name of the attribute the function gets. If that attribute doesn't exist in the built in dict, a keyerror would happen. We catch that error and call our _setAttrib() function. This function is where the look up is built up using some other class attributes we'll get to later. A session call is made and the value is fed into the setattr python built-in. All this work happens behind the scenes to the bit of code just trying to access the attribute, and the lookup only happens once. That's all we really need for now in the base class, lets create a Computer class.
class Computer(CServOBJ):
    """A class to represent the Computer.Computer CServ API class"""

    _qclass = 'Computer.Computer'
    def __init__(self, number):
        self.number = number
        self._qval = self.number
super(Computer, self).__init__()
That's all there is to it. _qclass is defined as a class attribute, it does not change per-object. It is the class name passed into the remote API. The object creation takes a number, which is the identifier for computers in our system. It assigns that to the number attribute so that if we reference computer.number we don't make another API call. _qval is the place holder that will be common across all the objects for what do use as a look up key. The parent class's init is called (which skips all the way up to CServ) to complete the object creation.
With this setup, we can program against it very easily to access and cache data:
comp = Computer(432888)
print(comp.number)
  432888
print(comp.primary_ip)
  10.14.232.158
MAGIC!
Now if you are like me, you spend a lot of time in things like ipython or bpython to interactively program stuff and play with objects and whatnot. These environments provide tab completion, help functions, etc... With our current code though, we couldn't tab complete the available attributes. Only the name attribute and the functions we've created would show up. To fix that, we need to overload the built in __dir__ function. This function is used when getting a listing of what is available to an object, dir(object). A useful exploratory tool. ipython/bpython use this method to see what tab completion options to provide you. Luckily our internal service provides an API call to get a listing of possible attributes, so we can hook that into __dir__. But of course we only want to do this API call once (per object) so we will want to make it a property. Since there is nothing API class specific we can put the code into the CServOBJ class:
    def __init__(self):
        self._attributes = None
        super(CServOBJ, self).__init__()

    @property
    def attribs(self):
        if not self._attribs:
            self._attribs = []
            resp = self.session.get('%sattributes/%s' %
                                    (self.API, self._qclass))
            for att in resp.json():
                self._attribs.append(att[0])
        return self._attribs

    def __dir__(self):
        return sorted(dir(type(self)) + list(self.__dict__) + self.attribs)
Since we are creating a property at this level we will grow an __init__ function to prep for that. Then we define the attribs() function. A short-cut is taken here, instead of calling out to some other function to load the attributes the load is done directly. Any time a Computer object gets a dir() call our overloaded function will return a sorted list that is the combination of the built in functions/attributes, anything that has been added to the specific object, and the available API attributes. Tab-completion achieved!
This has been a quick look into some of the magic you can do with Python. It's not quite antigravity, but it is useful, and food for thought for anybody that's programming against remote APIs. Objects are good, objects with dynamic attributes are better, and tab completion is icing on the cake. Enjoy!
Monday, January 28, 2013
New blog name, new focus
I've renamed this blog to "Adventures in The Cloud". My day job is now DevOps for Rackspace's public cloud, and I'll occasionally blog about those adventures. This is where those blog posts will land.
Right now I'm still learning my way around things and finding places to help out, so not a lot to blog about yet. My first big task is a cleanup of our cloud, finding VMs that are still running that should be deleted, VMs stuck in a delete action, or VMs that aren't running any more but our DB thinks they are. There are various other clean up items I'm finding along the way. The software I'm writing to do this will likely be contributed to OpenStack upstream at some point (soon) as it'll be useful to anybody running an OpenStack based cloud. Nobody likes wasted resources!
That's all for now, back again when I have something fun to talk about.
Subscribe to:
Posts (Atom)